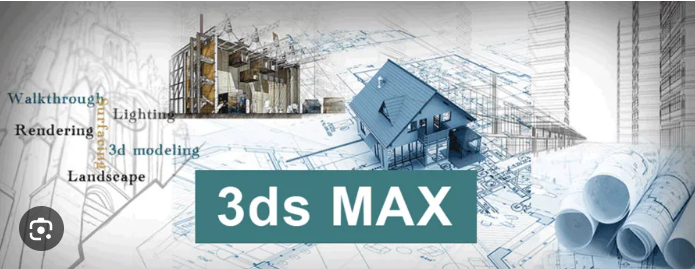
AutoDesk 3ds Max Course in Visakhapatnam | To choose the right Autodesk 3ds Max course, you should consider your experience level, budget, and career goals. Courses are available online through major platforms like Udemy and Coursera, as well as via specialized training centers.
Factors to consider
- For beginners: AutoDesk 3ds Max Course in Visakhapatnam | Look for an introductory course that teaches the basics, such as navigating the user interface, understanding modeling techniques, and working with materials and lighting. Many online platforms offer beginner-friendly courses.
- For architectural and design professionals: If your goal is architectural visualization, look for specialized courses. These programs often integrate 3ds Max with other industry tools like AutoCAD and focus on creating photorealistic interior and exterior scenes with advanced lighting techniques.
- For game developers and animators: If you are interested in creating game assets, characters, or virtual reality experiences, you will need a course that covers rigging, animation, and integration with game engines like Unreal Engine.
What you will learn
While specific topics vary by course, a comprehensive 3ds Max curriculum typically covers:
- User interface and navigation: AutoDesk 3ds Max Course in Visakhapatnam | Familiarizing yourself with the software’s layout.
- 3D modeling: Creating complex 3D objects using techniques like polygonal, spline, and NURBS modeling.
- Texturing and materials: Learning to apply realistic textures and materials to models.
- Lighting and rendering: Setting up lighting and rendering scenes to produce high-quality, photorealistic images. Courses may cover popular renderers like Arnold, V-Ray, or Corona.
- Animation and rigging: Understanding keyframe animation, character rigging, and animating objects.
- Post-production: Enhancing final renders using other software like Adobe Photoshop.
AutoDesk 3ds Max Course in Visakhapatnam | Of course. Here is a comprehensive and structured outline for an AutoDesk 3ds Max Course, designed to take a student from foundational concepts to proficient use in 3D modeling, animation, and rendering.
Course Title: Autodesk 3ds Max Mastery: 3D Modeling, Animation, and Rendering
Target Audience: AutoDesk 3ds Max Course in Visakhapatnam | Aspiring 3D artists, architects, game developers, interior designers, motion graphics artists, and visualization specialists.
Prerequisites:
- Basic computer literacy (Windows OS). 3ds Max is a Windows-only application.
- An understanding of basic 2D and 3D concepts is helpful.
- A strong interest in art, design, architecture, or animation.
- No prior 3D experience is required.
Course Goal: AutoDesk 3ds Max Course in Visakhapatnam | To equip students with the skills to create professional-quality 3D models, materials, animations, and renders for industries such as architecture, game development, film, and product visualization.
Detailed Course Modules
Module 1: The 3ds Max Interface & Core Concepts
- 1.1 Introduction to the 3D Pipeline: Overview of the standard workflow: Modeling, Texturing, Lighting, Animation, and Rendering.
- 1.2 The 3ds Max Interface: Deep dive into the Viewports, Command Panel, Main Toolbar, Timeline/Track Bar, and the Graphite Modeling Tools.
- 1.3 Viewport Navigation: AutoDesk 3ds Max Course in Visakhapatnam | Mastering zoom, pan, orbit, and viewport configurations (Perspective, Orthographic, etc.).
- 1.4 Object Creation & Transformation: Creating primitive objects (cubes, spheres, cylinders). Using the transform tools: Move, Rotate, and Scale.
- 1.5 Project Folder Setup: Configuring project folders to manage assets, scenes, and renders efficiently.
Module 2: 3D Modeling Techniques
- 2.1 Modifier Stack Workflow: AutoDesk 3ds Max Course in Visakhapatnam | The heart of 3ds Max’s non-destructive editing. Understanding how modifiers (like Bend, Twist, Taper) affect geometry.
- 2.2 Spline Modeling: Creating and editing shapes with lines and splines. Using Extrude, Lathe, and Bevel modifiers to create 3D objects from 2D shapes.
- 2.3 Editable Poly Modeling: The industry-standard modeling method. Converting objects to Editable Poly and using its sub-object levels: Vertex, Edge, Border, Polygon, and Element.
- 2.4 Key Editing Tools: Loop and Ring selections, Connect, Extrude, Bevel, Bridge, and TurboSmooth for adding detail and creating organic forms.
- 2.5 Introduction to Sculpting: Using the Freeform tools for digital sculpting.
Module 3: Materials & Texturing

- 3.1 Material Editor (Slate): AutoDesk 3ds Max Course in Visakhapatnam | Navigating the node-based Slate Material Editor to build complex materials.
- 3.2 Standard & Physical Materials: Understanding material properties like Diffuse, Specular, Roughness, and Metalness.
- 3.3 Mapping Coordinates: Applying and adjusting UVW Map and Unwrap UVW modifiers to control how textures are applied to 3D objects.
- 3.4 Bitmap Textures: Applying image files (JPEG, PNG, TIF) to create realistic surfaces like wood, brick, and fabric.
- 3.5 Procedural Textures: AutoDesk 3ds Max Course in Visakhapatnam | Using noise, tiles, and gradients to create materials without bitmaps.
- 3.6 Introduction to PBR Materials: Working with Metalness/Roughness workflows for modern game and film assets.
Module 4: Lighting Techniques
- 4.1 Principles of 3D Lighting: Understanding the three-point lighting system (Key, Fill, Rim light).
- 4.2 Standard Lights: Using Omni, Spot, and Direct lights.
- 4.3 Photometric Lights: Using IES profiles and real-world light data for architectural accuracy.
- 4.4 Daylight System: Simulating accurate sun and sky light based on geographic location, time, and date.
- 4.5 Light Properties: Controlling intensity, color, shadows, and attenuation.
Module 5: Cameras & Composition
- 5.1 Creating Cameras: Placing Target and Free cameras in a scene.
- 5.2 Camera Settings: Adjusting focal length (lens size), FOV (Field of View), and camera angle to create dynamic shots.
- 5.3 Composition Techniques: Applying rules of thirds, leading lines, and framing to create visually appealing renders.
- 5.4 Camera Animation: Creating simple camera moves for fly-throughs and walkthroughs.
Module 6: Animation Fundamentals
- 6.1 Keyframe Animation: AutoDesk 3ds Max Course in Visakhapatnam | Using the Auto Key and Set Key modes to create basic transformations over time.
- 6.2 Timeline & Track Bar: Setting and editing keyframes.
- 6.3 Curve Editor (Graph Editor): The powerful tool for refining animation by adjusting the interpolation and timing of keyframes.
- 6.4 Constrained Animation: Using Path Constraint to attach an object to a spline path for easy traversal animations.
Module 7: Rendering
- 7.1 Render Setup Dialog: AutoDesk 3ds Max Course in Visakhapatnam | Configuring output resolution, frame range, and file saving options.
- 7.2 Scanline Renderer: Understanding the default renderer.
- 7.3 Arnold Renderer: Deep dive into 3ds Max’s powerful, modern built-in renderer for high-quality, photorealistic results.
- Arnold Lights, Materials, and Sky.
- Optimizing Arnold render settings for speed vs. quality.
- 7.4 ActiveShade: Real-time previewing of renders.
- 7.5 Render Elements: Rendering separate passes (Diffuse, Specular, Reflection, Z-Depth) for advanced compositing in software like Photoshop or After Effects.
Module 8: Specialized Topics (Choose based on focus)
- 8A. Architectural Visualization:
- Importing CAD drawings (DWG) as a reference for modeling.
- Using the Forest Pack plugin for scattering trees and objects.
- Creating realistic interior lighting setups.
- 8B. Character Animation:
- Basic rigging with bones and the Skin modifier.
- Introduction to Biped for character animation.
- 8C. Particle & Dynamics:
- Using Particle Flow for effects like smoke, fire, and dust.
- MassFX rigid body and cloth dynamics for realistic simulations.
Module 9: Project Workflow & Portfolio Development
- 9.1 Scene Assembly: AutoDesk 3ds Max Course in Visakhapatnam | Efficiently managing large scenes with groups, layers, and containers.
- 9.2 Post-Production Basics: Using the Render Frame window for quick color corrections and saving renders.
- 9.3 Creating a Portfolio Piece: AutoDesk 3ds Max Course in Visakhapatnam | Guidance on planning, executing, and presenting a final project.
Module 10: Capstone Project
- Students will create a complete, portfolio-quality scene from start to finish.
- Example Projects:
- Arch Viz: A fully furnished and lit interior or exterior architectural scene.
- Product Design: A photorealistic render of a product (headphones, car, furniture) in a studio setting.
- Game Asset: A low-poly or high-poly game asset with baked textures.
- Requirements:
- Original modeling (can use some pre-made assets).
- Custom material and texture creation.
- A dynamic lighting setup.
- A composed camera shot.
- A final, high-quality render.
Recommended Tools & Version
- Software: Autodesk 3ds Max (Latest version, available via Autodesk Education Community for free for students and educators).
- Plugins (Optional): Arnold Renderer (included), V-Ray/Corona (industry standards for arch-viz), Forest Pack.
- Resources: Texture libraries (Poliigon, Texturehaven), model libraries (Sketchfab, TurboSquid).
Learning Outcomes

Upon completion, students will be able to:
- AutoDesk 3ds Max Course in Visakhapatnam | Navigate the 3ds Max interface and configure it for an efficient workflow.
- Create complex 3D models using both spline-based and polygonal modeling techniques.
- Create and apply realistic materials and textures using the Physical Material and Arnold shaders.
- Set up dynamic and realistic lighting scenarios for both interior and exterior scenes.
- Animate objects and cameras using keyframes and the Curve Editor.
- Configure and execute high-quality photorealistic renders using the Arnold renderer.
- Understand the complete 3D production pipeline from a blank scene to a finished image.
- Produce a professional-quality piece for their 3D portfolio.
AutoDesk 3ds Max Course in Visakhapatnam | This curriculum is intensely practical, emphasizing a “learn by doing” approach. The capstone project is essential for students to synthesize all the individual skills they’ve learned into a single, cohesive work that demonstrates their capabilities to potential employers or clients.